REVIEW · BUDAPEST
Budapest Photo Walks
Book on Viator →Operated by Budapest Photo Walks · Bookable on Viator
Want better Budapest photos without the tourist shuffle? This small, flexible Budapest photo walk is built for real shooting time, with day or night options and a route that adjusts to you. I like that you can shape it to your interests, not just follow a fixed line of photo spots.
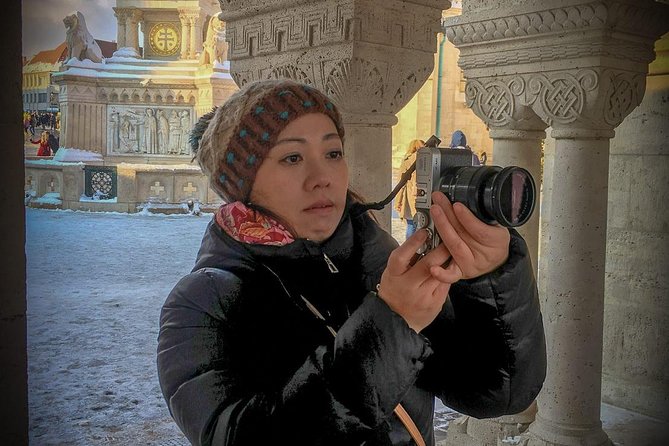
Two things I really love: the included tripod (huge for sharper shots, especially after dark), and the way the guide—Zoltán—explains photography steps patiently and in plain language. He also brings city context along the way, so your pictures come with a why, not just a where.
One possible drawback: the itinerary can shift with weather and your fitness, so if you’re trying to hit exact “must-capture” frames on a tight schedule, you’ll need a little flexibility.
In This Review
- Key Highlights You’ll Feel Right Away
- A Small-Group Photo Walk That Actually Helps You Shoot
- Price and What $179.74 Buys You (And What It Doesn’t)
- Where You Meet at Batthyány tér (And Why That Helps)
- Stop 1: Gellért Hill Viewpoints by Day and Night
- Stop 2 and Stop 3: Castle Area Angles and the Chain Bridge Moment
- Stop 4: Batthyány Square and Classic Parliament Framing
- How the Tripod Changes Night Photography (More Than You Think)
- The Guide’s Style: Zoltán and the Mix of Photo Tips + City Context
- Day Walk vs Night Walk: Pick Based on the Photos You Want
- What to Expect From a 2–3 Hour Custom Walk
- Who This Tour Fits Best (And Who Might Want Something Else)
- Quick Practical Tips Before You Go
- Should You Book Budapest Photo Walks?
- FAQ
- How long is the Budapest Photo Walk?
- Does the tour offer both day and night options?
- What’s included in the price?
- Is transportation included?
- What language is the tour offered in?
- Where do I meet the guide?
- How many people are on the tour?
- Are tickets required for the viewing stops?
- Is there an option for cancellation?
- Is the itinerary fixed, or does it change?
- Can I bring a service animal?
Key Highlights You’ll Feel Right Away

- A 2–3 hour customizable route built around your request and the weather
- Tripod included for steadier shots and easier night photography
- Day or night options with different angles and lighting
- Small group: max 2 travelers so you’re not rushed
- Off-the-beaten-track vantage points away from the densest crowd spots
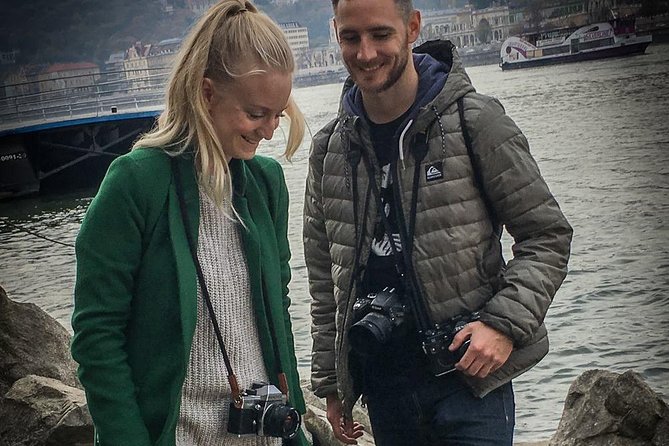
- Guide Zoltán who pairs photography tips with Budapest context
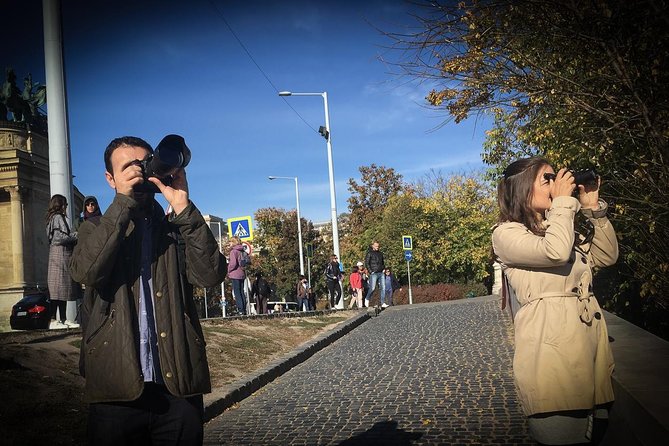
A Small-Group Photo Walk That Actually Helps You Shoot
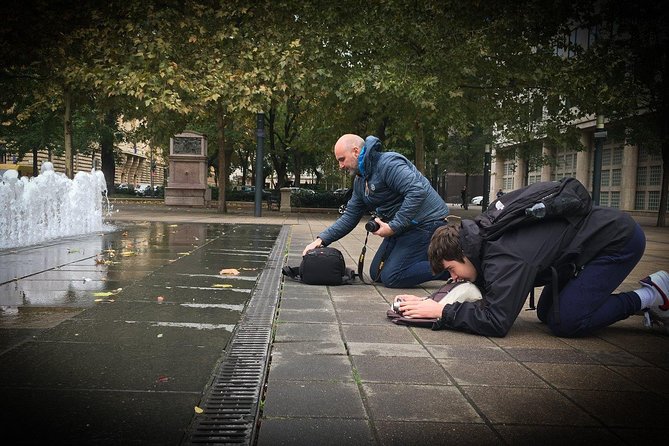
This isn’t one of those tours where you stop, snap one photo, and move on. The value here is practical. You get time at a handful of viewpoints, and you learn how to make them work with your camera—whether you’re using a phone or a real camera.
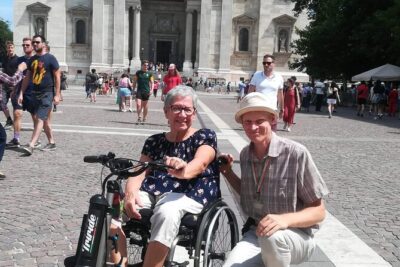
The group size matters. With a maximum of 2 travelers, you’re far more likely to get feedback on what you’re doing and why something isn’t coming out the way you hoped. If you’ve ever watched a guide bark instructions to a crowd, you’ll appreciate the calmer pace.
You also choose between a day itinerary and a nighttime itinerary with flexible dates and times. That’s a smart way to match the kind of photos you want—bright, clear city views in daylight, or the dramatic lighting and long-exposure opportunities that show Budapest’s riverfront mood.
You can also read our reviews of more tours and experiences in Budapest.


Price and What $179.74 Buys You (And What It Doesn’t)
At $179.74 per person for a 2–3 hour experience, you’re paying for guided photo time, not a bus ride and a checklist. The tour does not include private transportation, so you’re doing the walking and meeting at Batthyány tér.
Is that a good value? For a photo walk, yes—because the tripod is included, the route is flexible, and you get hands-on guidance. If you like learning while you shoot, that guidance usually costs extra when you book it as lessons. Here, it’s folded into a sightseeing-style outing with viewpoints.
Also, the tour is booked well in advance on average (about 46 days). That’s often a sign the time slots are popular, especially for night walks when lighting is a big deal.
Where You Meet at Batthyány tér (And Why That Helps)
You start at Batthyány tér (1011 Budapest), in front of the metro M2 station. The end point is not “locked in” forever. It’s agreed with you at the beginning of the tour.
That flexibility is more useful than it sounds. If your pace is slower, or your camera setup needs extra time, the guide can adjust the ending location so you aren’t forced into a sprint back to the same spot.
And because you’re near public transportation, you’re not stuck with a remote meeting time. You can plan your day around getting to and from Batthyány tér without building a whole extra commute into your schedule.
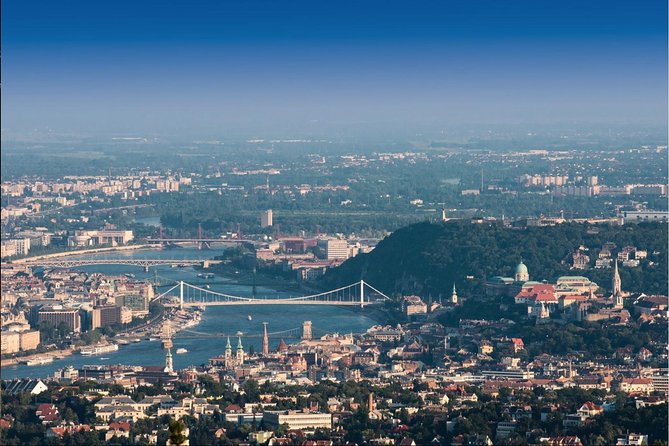
Stop 1: Gellért Hill Viewpoints by Day and Night
Gellért Hill is where the tour gets serious about angles. This stop is part of both day and nighttime walks, so the lighting changes what you’ll want to focus on.
You’ll cover 4–5 main view points depending on what you ask for and how you’re moving that day. If you want more time at fewer angles, you can ask for it. If you want a faster “hit the best spots” pace, that can work too—within reason and with weather in mind.
In practical terms, this is the part of Budapest where you can build a set of photos with variety: wide views, bridge-and-river relationships, and compositions that feel less like postcards. Gellért Hill gives you that elevated perspective that makes the city’s layout easier to photograph.
One thing to plan for: you should expect some walking and stairs-like terrain. The tour says the itinerary depends on your fitness, so be honest about your limits early. It’s the best way to keep the session enjoyable instead of stressful.
Stop 2 and Stop 3: Castle Area Angles and the Chain Bridge Moment
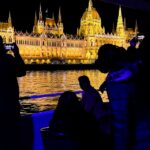
For the night tour, you’ll add the viewpoint around Castell de Buda, with a focus on the roundabout and the Chain Bridge view.
This is the “wow, Budapest glows at night” section. Bridges and city lights can produce long, smooth streaks if you’re set up for night shooting. With a tripod included, you’re not stuck trying to brace your camera against a wall and hope for the best.
Then comes Liberty Bridge (Szabadság hid), again in both day and night options, with a view that includes Gellért Hill. This is a great place to play with framing. You can treat the bridge as a leading line that pulls your eye toward the hill and the riverfront scenery.
A small timing note: the schedule lists short stop windows at each location, so your “best shots” will come from quick adjustments—composition, shutter speed, and where you place the camera on the tripod. If you want extra time somewhere, bring it up early so the guide can rearrange the flow.


Stop 4: Batthyány Square and Classic Parliament Framing
Your fourth stop is Batthyány Square, where you’ll get that classic Parliament view. This spot shows up for both day and nighttime walks.
What makes this stop valuable for photography is that it’s not just about capturing a famous building. It’s about learning how to fit a major landmark into a composition without making it look flat or off-balance. The guide can help you think about distance, lines, and how to keep the frame from feeling chaotic.
Daytime shots here tend to be about clarity and shape. Night shots tend to reward patience—setting up the tripod, allowing for stable framing, and paying attention to how lights reflect and smear (or don’t) depending on your settings.
If you’re newer to photography, this is also a friendly location to learn fundamentals. The building gives you consistent reference points, so you can spot what’s going wrong faster—too much shake, wrong angle, or a horizon that isn’t level.
How the Tripod Changes Night Photography (More Than You Think)
The tripod isn’t just a “nice-to-have.” It’s the difference between lucky photos and repeatable results.
At night, you usually need slower shutter speeds to capture enough light. Handheld shots at slow speeds can blur. With the tripod included, you can stabilize your camera and focus on composition instead of fighting camera shake.
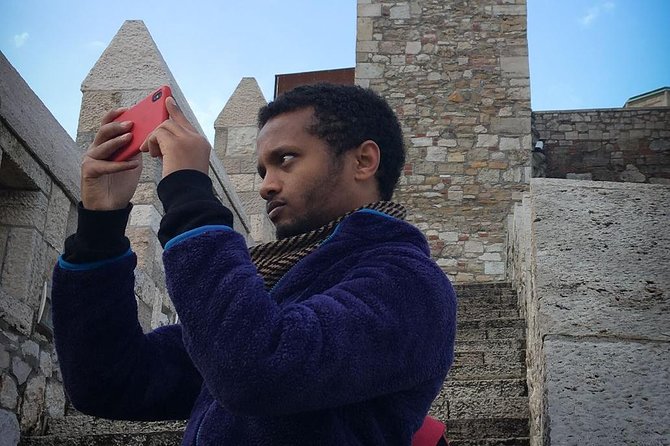
That also means you can experiment more confidently. You can test a slower shutter for a smoother look, or adjust your framing without worrying that a sudden movement ruins the shot. If you’re using a phone, you might still find it helpful to steady your setup—though you’ll want to follow whatever method the guide suggests for your device.
This tour is also pitched as a primer for beginners. If you’re still figuring out how composition and camera settings connect, you’ll likely find the pace supportive. You won’t be thrown into jargon.
The Guide’s Style: Zoltán and the Mix of Photo Tips + City Context
The standout theme in feedback is the guide’s teaching style. Zoltán is described as patient and good at explaining photography in a way that’s easy to follow.
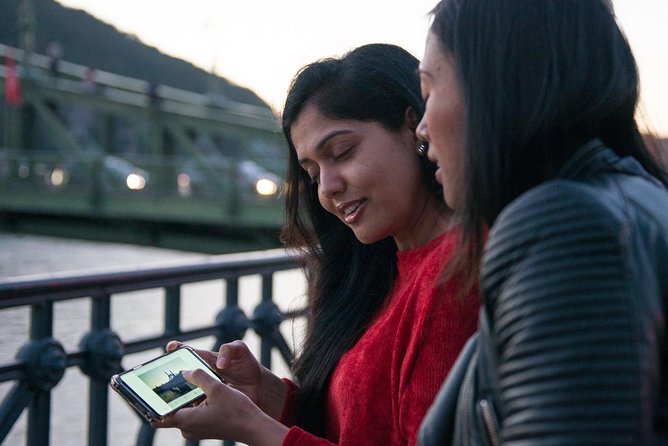
That matters because learning photography during a sightseeing tour can go two ways: either the guide shows you places, or the guide teaches you how to see. Here, you get both. You’re not only told where to stand—you get help thinking about why one angle works better than another.
You’ll also pick up city context while you shoot. That extra background makes it easier to plan what you want to photograph next, and it helps the photos feel more meaningful after the trip when you’re sorting your images.
Day Walk vs Night Walk: Pick Based on the Photos You Want
Choosing day versus night isn’t just about comfort or weather. It changes the whole “photo problem.”
Daytime tends to be about crisp detail, clean lines, and easier framing. It’s also typically simpler if you’re still learning camera basics because you can shoot faster without needing a ton of stability.
Nighttime is more about light control and mood. You’re dealing with city glow, bridge reflections, and longer exposures. This is where the tripod earns its keep.
If you’re a beginner and want confidence fast, start with a day walk. If you’re already comfortable aiming and want dramatic results, the night walk can be more rewarding—especially with a guided setup that keeps you from guessing.
What to Expect From a 2–3 Hour Custom Walk
The tour is listed as 2 to 3 hours, and it’s designed to adapt. The guide can cover around 4–5 main viewpoints during the Gellért Hill portion, and the rest of the itinerary flexes depending on requests, fitness, and weather.
That flexibility is great if you’re learning and want time to practice. It’s also helpful if you’re picky about framing. But it does mean you shouldn’t schedule other “must be there at 10:15” plans right after unless you’re comfortable with a little uncertainty.
The tour also includes free admission for the listed stops. You’re paying for guidance and time, not tickets to pay at the counter along the way.
Who This Tour Fits Best (And Who Might Want Something Else)
This is a strong match if:
- you want better photos without spending your whole trip in camera mode
- you’re new enough that you’d like composition and settings explained clearly
- you want a small group experience instead of a crowd
- you enjoy Budapest views from higher angles and bridge perspectives
It may be less ideal if:
- you hate walking or you want a fully seated experience
- you’re chasing very exact shot dates and can’t adjust if the weather changes
- you want door-to-door transportation (private transport is not included)
Quick Practical Tips Before You Go
You’ll get the most out of the tour if you arrive ready to shoot and ask questions.
Bring what you typically use to photograph (camera or phone), and think about whether you want to focus on wide city shots or tighter details like bridge lines and landmark framing. If you have a tripod already, you still get one here, but it’s smart to plan how you’ll carry it comfortably.
Wear shoes that handle uneven ground and stairy sections around hill and viewpoints. And if you have a preference—day over night, or a certain composition style—share it early so the guide can shape the itinerary.
Should You Book Budapest Photo Walks?
Yes, if your goal is to come home with photos that look intentional. The combination of a small group, a guided approach to composition, and an included tripod makes this feel like more than sightseeing. If you’re at least a beginner-or-intermediate shooter, you’ll likely appreciate how Zoltán helps you connect what you see with what you set on your camera.
If you’re the type who wants a fixed “everyone hits the same exact stops” tour, you may find the weather-and-fitness flexibility a little unpredictable. But if you’re traveling in Budapest anyway—and you want viewpoints like Gellért Hill, the Chain Bridge view area, Liberty Bridge, and Batthyány Square—the flexibility is also the point.
FAQ
How long is the Budapest Photo Walk?
It runs about 2 to 3 hours, depending on your needs and how the itinerary adjusts.
Does the tour offer both day and night options?
Yes. You can choose between day or nighttime itineraries, with flexible dates and times.
What’s included in the price?
The price includes a tripod.
Is transportation included?
No, private transportation is not included.
What language is the tour offered in?
The tour is offered in English.
Where do I meet the guide?
You meet at Batthyány tér in front of the metro M2 station.
How many people are on the tour?
The tour has a maximum of 2 travelers.
Are tickets required for the viewing stops?
The listed admissions are free for the stops included in the tour.
Is there an option for cancellation?
Yes. You can cancel for a full refund up to 24 hours in advance.
Is the itinerary fixed, or does it change?
It can vary based on your fitness, your requests, and the weather.
Can I bring a service animal?
Yes, service animals are allowed.