REVIEW · BUDAPEST
Explore Budapest in Pictures: Guided Tour Photo Tour
Book on GetYourGuide →Operated by Solange colque · Bookable on GetYourGuide
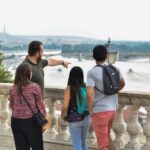
Budapest looks different through a camera. This guided photo tour teaches you how to frame the city’s big monuments and everyday details, starting at the Chain Bridge. It’s built for all levels, but it’s especially useful if you want more than point-and-shoot results.
I like the structure: you stop at the key views you’ll actually want to photograph, then get practical tips tied to that exact location. I also like that you’re not only learning in the moment—you’ll get additional photos taken by the guide mailed to you, plus extra recommendations to keep improving.
One drawback to keep in mind: there are reports of the guide not showing up at the meeting point, with people waiting in very cold conditions. If weather is harsh or you’re traveling on a tight schedule, plan a little extra buffer.
In This Review
- Key highlights worth your attention
- Price and what you really get for $17
- Meeting point and how to actually find the guide
- Chasing the best angles: Chain Bridge to start strong
- Buda Castle cobblestone lessons: where light becomes your tool
- Castle Quarter details: taking everyday scenes without slowing the group
- Matthias Church: shooting the tiled ceiling with a clear plan
- Parliament of Budapest: iconic building, timing your best light
- Heroes’ Square finish: statues, scale, and your final photo set
- Practical photo tips you’ll use immediately
- Inclusions that make a difference on a short tour
- What’s not included: entrance fees and equipment rental
- Who this tour is for (and who should reconsider)
- A note on reliability: the biggest decision factor
- Should you book this Budapest photo tour?
- FAQ
- How long is the Explore Budapest in Pictures photo tour?
- What places does the tour include for photos?
- What language is the live tour guide?
- What is included in the price?
- Are entrance fees included for monuments or museums?
- Do I need my own camera?
- What if I need to cancel?
Key highlights worth your attention
- Chain Bridge first: start with a classic angle of the Danube so you learn composition early.
- Stop-by-stop coaching: photo advice is tailored to your level, not generic rules.
- Buda Castle streets and texture: cobblestones, alleys, and gates give you lots of “foreground options.”
- Matthias Church ceiling challenge: a specific subject that’s easier to shoot after guidance.
- Parliament by day, possible dusk: timing matters, and the tour tries to use softer light when conditions allow.
- Extra photos from the guide: you leave with more than what you captured yourself.
Price and what you really get for $17
At $17 per person for 3 hours, this is priced like a practical city experience, not a high-end workshop. You’re paying for a local guide plus coaching focused on how to photograph what you came for: bridges, castles, churches, and grand squares.
The value is in the mix of instruction and support. You get photo tips on composition and light, you move through a tight route with a small group, and you also receive extra photos taken during the walk. That last part matters if you’re traveling solo, don’t want to hunt for the “best shot” all day, or just want a second set of images to help you remember what you saw.
The main “value risk” isn’t the content. It’s reliability—because if the guide doesn’t arrive, you lose not only time, but the whole benefit of having someone point you to angles and timing.
You can also read our reviews of more guided tours in Budapest
Meeting point and how to actually find the guide
The meeting point detail is simple: the guide will be recognized because they will be wearing an umbrella. That’s helpful in theory, but if you’re unfamiliar with the area, bring a little patience and consider arriving early enough to get oriented before the start time.
Also note the tour is Spanish. If you speak little Spanish, you can still benefit from the visuals and how-to focus, but you’ll get the most if you’re comfortable asking a question or following basic prompts.
Chasing the best angles: Chain Bridge to start strong
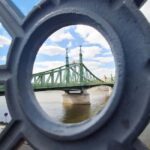
The tour begins at the Chain Bridge, and that’s a smart start for photography. It gives you a clear, iconic subject with strong geometry—bridge lines, the Danube’s curve, and dramatic building silhouettes in the background.
Here’s what you’ll likely work on at the start: how to manage framing so the bridge looks intentional instead of just “in the photo.” A good coach will have you consider foreground vs. background, and how to keep the horizon and major lines from drifting.
You’ll also get panoramic views of the Danube, which is where many people either over-shoot or under-compose. With guidance, you can learn how to shoot wider without losing the “center of gravity” of the scene. This early lesson also helps later stops, because the same composition ideas carry over.
One practical note: the area around big bridges can be windy and crowded. Comfortable shoes help, and a charged smartphone helps if you want quick test shots and adjustments.
Buda Castle cobblestone lessons: where light becomes your tool
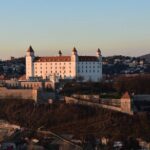
Next up is Buda Castle, and the tour leans into what makes it photographable: cobblestone alleys, varied elevations, and sweeping city views. The key value here is that you’re learning how to shoot grand architecture and the smaller textures that people often ignore.
In a place like Buda Castle Quarter, light changes fast. Shadows from walls and towers can help your photos look more dimensional—if you time it right. You’re also more likely to notice strong leading lines in narrow streets, which is perfect practice for composition.
If you’re used to taking straight-on shots, this is where you’ll learn to “work the frame.” The tour’s focus on playing with light and framing is exactly what turns a typical view into something that feels more like Budapest and less like a postcard.
A drawback of this stop area is logistics on your feet. Expect walking on uneven ground and lots of short photo breaks, so plan on moving steadily for the full 3 hours.
Castle Quarter details: taking everyday scenes without slowing the group
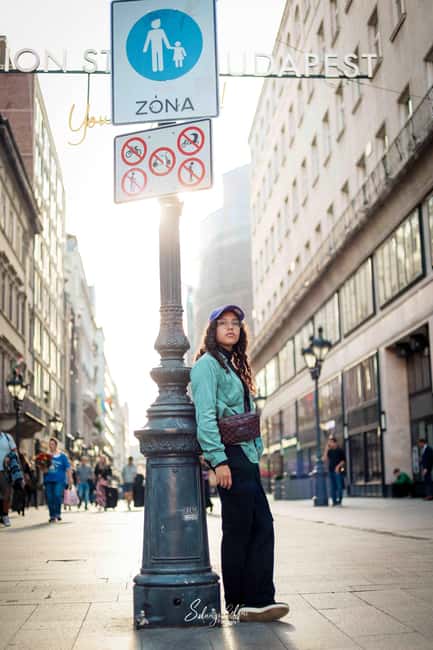
From Buda Castle you head into the streets of the Castle Quarter, where the guide points out architectural details like ancient gates and colorful facades. This is a gift if you want photos that feel personal, not just famous.
The challenge here is balancing patience with motion. You can’t stop every 10 steps, or you’ll get a handful of close-ups but miss the bigger views. The coaching helps you choose: what to shoot now, what to simplify, and how to get a clean shot even in narrow spaces.
If you want Instagram-style results, this part is where it usually clicks. Small scenes—doorways, arches, street corners—often look great with a bit of guidance on angle and how close you stand.
Also: conditions matter. Wind, people, and changing shadows can affect what you can capture. Keep your settings ready and take quick test shots so the “good light” doesn’t pass you by.
You can also read our reviews of more photography tours in Budapest


Matthias Church: shooting the tiled ceiling with a clear plan
At Matias Church, you’re going after something specific: the brightly tiled ceiling and the church’s medieval history. The ceiling detail is exactly the kind of subject that’s hard to photograph well without instruction, because it mixes color, pattern, and low-contrast shadows.
A good guide can help you avoid two common problems: blurry images from awkward angles, and photos that cut off the subject so it looks accidental. With a teaching approach focused on framing, you’ll likely learn how to position yourself to keep the design visible and readable.
You’ll also get a chance to connect the grandeur with history, not by reading a wall of text, but by learning what to look for in the visual design. That makes the experience feel more meaningful, because your camera isn’t just recording—it’s helping you notice.
If you’re hoping to photograph inside specific areas, remember entrances aren’t included. You may choose to view from outside if you decide not to pay any monument or museum fees.
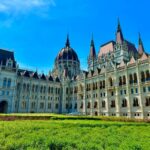
Parliament of Budapest: iconic building, timing your best light
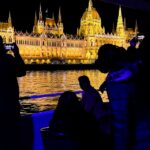
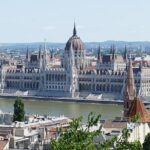
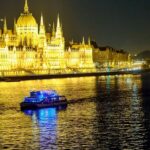
The tour then moves toward the Parliament of Budapest, and this is one of the city’s most recognizable scenes. You’ll have the chance to photograph it by day, and conditions permitting, you may catch some softer light at dusk.
That “conditions permitting” note matters. Dusk photos are often about gentle contrast and reduced glare, which can make Gothic details easier to see. If the schedule works and the light is cooperative, this stop becomes much more than a quick snap.
Even if you only get daylight, this is still a strong photo opportunity because Parliament has clear lines and a dramatic silhouette. A guide can help you practice keeping verticals straight and managing reflections and brightness around the riverfront.
The practical side: Parliament area can be busy, and street angles can limit your choices. That’s where the benefit of a guided route and “unique angles” mentioned for the tour can pay off.
Heroes’ Square finish: statues, scale, and your final photo set
The tour ends at Heroes’ Square, where history and scale are part of the visual language. This is where you shift from “collect landmark shots” to “build a final set.” You’ll focus on the majesty of statues and monuments and keep improving your photographic technique at the last stop.
Heroes’ Square is great for learning because it forces you to work with symmetry and distance. Many photos fail here because they’re too close, too zoomed, or too tilted. With coaching, you can learn how to show the square’s layout so it feels structured, not cropped or chaotic.
It’s also a good place to revisit things you tried earlier. You can compare your Chain Bridge framing to your Heroes’ Square framing and see what changed. That makes the whole 3-hour experience feel like progress instead of a list of stops.
Practical photo tips you’ll use immediately
This tour isn’t only about seeing landmarks. The focus is on how to photograph them with useful technique, including:
- Composition choices tied to each stop, so you’re not memorizing rules in the air.
- Light management, especially at places where shadows and brightness change quickly.
- Framing and subject priority, so you include what matters and simplify what doesn’t.
- Grand + everyday moments, so you get both monument shots and small visual stories.
- Camera and phone-friendly approach, since you’re told you can bring cameras and cell phones and should bring a charged smartphone.
If you’re new to photography, the best part is that the guidance is personalized to your level. If you’re more advanced, you still benefit from having someone steer you toward angles and help you troubleshoot specific shots.
One more useful thing: you’re given additional material with recommendations after the tour. That helps if you want to take what you learned and repeat it later on your own.
Inclusions that make a difference on a short tour
For a 3-hour walk, the inclusions are doing real work.
You get a professional local photo tour guide and small groups, which usually means you’re not stuck waiting behind a crowd while someone else gets help. You’ll also have local transportation if necessary between some points, which matters because walking only works if the route and timing make sense.
The tour also includes access to exclusive locations and unique angles for photos. You can’t always assume you’ll be able to stand where the best view is—guides often know which spots are realistic and safe.
Finally, the tour includes additional photos taken by the guide, which are mailed to you. That’s a big deal when you’re trying to balance “learn something” with “actually come away with photos you like.”
What’s not included: entrance fees and equipment rental
Two things to plan around:
- Meals and drinks aren’t included. You’re told to bring food and drinks, which makes sense for a 3-hour schedule where you might not want to hunt for a café.
- Entrance fees aren’t covered. That means if you decide you want to go inside certain sites (like areas associated with Buda Castle or Matias Church), you’ll pay those separately.
- Photographic equipment rental is not included. If you don’t have your own camera, the tour can only recommend rental stores.
This tour is designed so you can still get plenty of value by photographing from outside if needed.
Who this tour is for (and who should reconsider)
This tour fits best if you want a structured route, quick coaching, and a final photo set by the end of the walk. It’s also ideal if you like famous scenes but want your photos to look more intentional than accidental.
It’s listed as wheelchair accessible, yet also marked as not suitable for people with mobility impairments. If you rely on mobility assistance, I’d treat this as a must-verify situation before booking.
It’s also marked not suitable for people with a cold, and not suitable for visually impaired or hearing-impaired people. If any of those apply, look closely at your needs and the on-the-ground conditions.
If you’re traveling with only a phone, you can still participate since the tour says you can bring cell phones. Just expect that lens range and low-light performance might limit some shots at dusk.
A note on reliability: the biggest decision factor
The tour has a low rating score (1 out of 5 across three reviews) and includes verified reports of the guide not arriving at the meeting point, with people waiting for about 30 to 45 minutes in very cold temperatures. That doesn’t mean every booking fails, but it does mean you should treat punctuality as the #1 variable.
If you book, I recommend you:
- arrive early and confirm you’re at the right umbrella meeting spot
- keep the first 15–20 minutes flexible
- have a backup plan for your day in case the start time slips or the guide doesn’t show
This is the part that can turn a great idea into a frustrating morning.
Should you book this Budapest photo tour?
Book it if you want a simple, guided way to photograph Budapest’s major hits in just 3 hours and you’ll benefit from hands-on tips about composition and light. I especially think it’s a good value if you like structure (you won’t have to reinvent the route) and if getting extra photos mailed by the guide would help you feel more confident about what you captured.
I wouldn’t book it blindly if reliability would wreck your schedule. With reports of no-shows at the start, this isn’t the safest “must-do” if you’re only in town briefly or you’re going to miss other plans waiting outdoors.
If you’re okay with that risk—or you can build in buffer time—this tour is a strong way to come away with photos that look like Budapest from your own eyes, not just a quick grab of landmarks.
FAQ
How long is the Explore Budapest in Pictures photo tour?
The tour lasts 3 hours.
What places does the tour include for photos?
You’ll visit Chain Bridge, Buda Castle, the Castle Quarter, Matias Church, the Parliament of Budapest, and end at Heroes’ Square.
What language is the live tour guide?
The live tour guide speaks Spanish.
What is included in the price?
The price includes a professional local guide, personalized coaching and photographic advice tailored to your level, small-group attention, additional photos taken by the guide (mailed to you), and extra recommendations/material.
Are entrance fees included for monuments or museums?
No. Entrance fees are not included, so you may need to pay to access interiors.
Do I need my own camera?
You should bring your own camera or phone. Equipment rental is not included, but rental stores can be recommended.
What if I need to cancel?
Cancellation is free up to 24 hours in advance for a full refund.