REVIEW · BUDAPEST
Create a unique leather accessory in downtown Budapest!
Book on Viator →Operated by Mittersisters leather workshops · Bookable on Viator
Leather in Budapest, in an hour.
This downtown workshop lets you create your own accessory from scratch, with step-by-step help on a tutorial tablet. You pick the style first (like a passport holder), then make it yours through hands-on work and guided decisions right at Mittersisters Táska Workshop.
I like that you get real choices without needing to be crafty already. The staff keeps things moving, the atmosphere feels relaxed, and the group stays small, with a maximum of 10 people. The only real catch is that the design part can be the hardest bit—color, leather options, metal details, and decorations all need decisions.
In This Review
- Key Things You’ll Notice Right Away
- Where Mittersisters Táska Workshop Is, and What the Setting Feels Like
- Picking Your Leather Accessory: The Four Main Choices
- A note on other possible items
- The Part That Takes Real Thinking: Color, Materials, Metal Hardware, Decorations
- The Workshop Flow: From Toolbox to a Real Craft Session
- Step 1: You choose your item and start your design plan
- Step 2: You get the “toolbox” with what you need
- Step 3: You follow the tutorial video on the tablet
- Step 4: Team support for the final touches
- How the 1-Hour Format Fits Into Your Budapest Day
- Personalization That Actually Feels Personal: Stamping Your Initials
- Price and Value: Why $66.08 for an Hour Can Make Sense
- Who This Leather Workshop Is Best For (and Who Might Skip It)
- Should You Book This Mittersisters Leather Workshop in Budapest?
- FAQ
- Where is the workshop located?
- How long does the experience take?
- What can I make during the workshop?
- Is the workshop offered in English?
- What do I get during the workshop?
- How many people can be in the group?
- Will I be able to personalize my item?
- Is free cancellation available?
Key Things You’ll Notice Right Away

- Choose your item first (passport holder, cardholder, sunglasses case, or two keychains)
- Design decisions drive the vibe: color, leather type, metal hardware, and decorations
- A tutorial tablet guides the steps with a professional video
- A small group format helps you get hands-on attention
- The team finishes the last touches and stamps your name or initials
- You leave with something you made—not a souvenir that looks generic
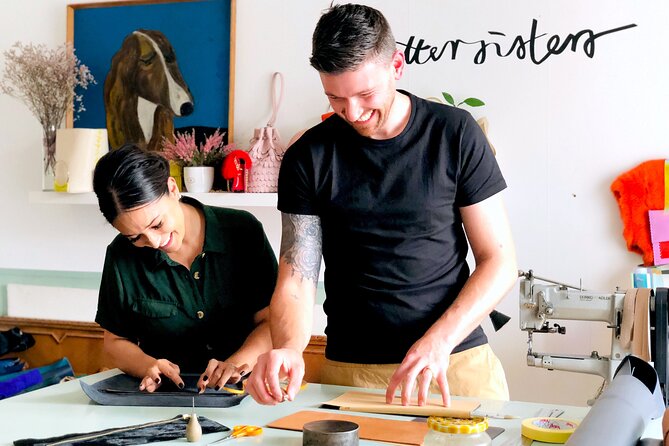
Where Mittersisters Táska Workshop Is, and What the Setting Feels Like
Mittersisters Táska Workshop is in downtown Budapest at Dob u. 34, 1074, right by Mitter Sister’s Táska Workshop (the address is the key—use it when you plug it into your map app). It’s also near public transportation, which matters because one-hour workshops are easy to fit around sightseeing.
Inside, it’s the kind of place where you’re not rushed through a sales pitch. You come in, you’re greeted, and you’re introduced to the person helping you. One reviewer even noted being welcomed by name, which tells you this isn’t run like a factory line. The max group size is 10, so you’re unlikely to feel lost while others move ahead.
If you prefer to keep your day flexible, this works well: the workshop runs Monday to Wednesday from 10:00 AM to 8:00 PM. Plan to arrive a few minutes early so you have time to settle before choosing options.
You can also read our reviews of more tours and experiences in Budapest.


Picking Your Leather Accessory: The Four Main Choices
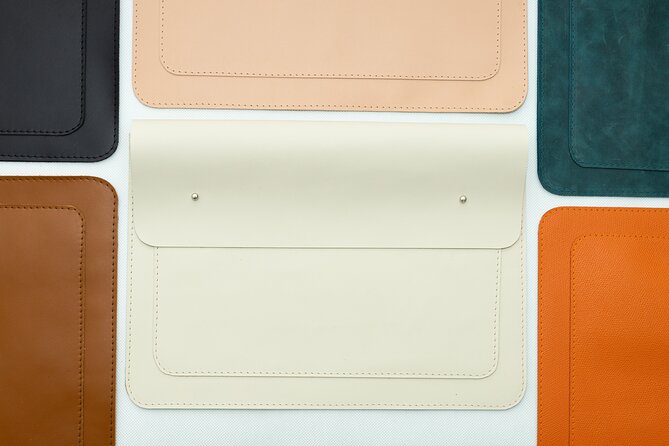
The experience is built around one simple idea: you get to create a useful leather item you’ll actually carry. At the start, you choose one of these options:
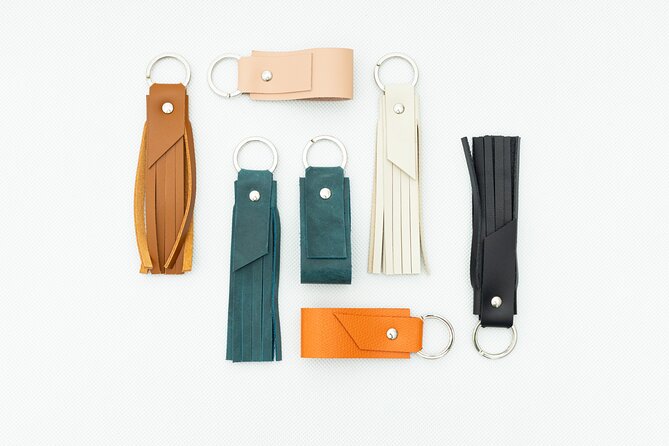
- One passport holder
- One cardholder
- One sunglasses case
- Two keychains
That choice shapes everything. A keychain is smaller and usually faster, while a passport holder has more structure and more pieces to get right. If you’re going for a quick win and a fun hands-on craft, keychains are a good starting point. If you want something you’ll use every time you travel, passport and card cases tend to feel like the best payoff.
One helpful detail: there’s a tablet tutorial for your chosen item. That means you’re not just handed leather and told good luck—you follow a guided process matched to what you selected.
A note on other possible items
While the core choices above are the ones clearly offered, the studio also runs other workshops. If you’re hoping for a specific accessory shape beyond the list, you might find other options available on the day. If it’s a must-have (like an earphone case idea you’ve seen online), ask what’s available when you book or when you arrive.
The Part That Takes Real Thinking: Color, Materials, Metal Hardware, Decorations

Let me save you from one common craft-day disappointment: the easiest part isn’t cutting and assembling. The hardest part is deciding what you want your final item to look like.
You’ll make design decisions around:
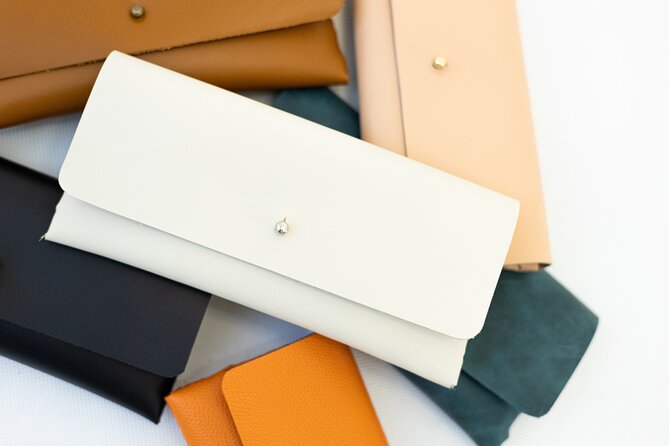
- Color (your leather tone choice)
- Material choices for parts of the item
- Metal accessories (hardware color and style)
- Decorations (the little visual touches)
This matters because your accessory isn’t a printed template. You’re building something where the “feel” comes from the small stuff—hardware finish, contrast, and how decorative elements are placed.
If you’re indecisive, give yourself permission to keep it simple. Pick a color you like first, then decide whether you want the hardware to blend in or create contrast. If you try to plan every detail like it’s a design studio, you might end up stressed right when you should be relaxing.
Also, this is why the staff and tutorial time are so valuable. Your choices are creative, but you’re not doing it blindly.
The Workshop Flow: From Toolbox to a Real Craft Session
Here’s how the session generally plays out, step by step.


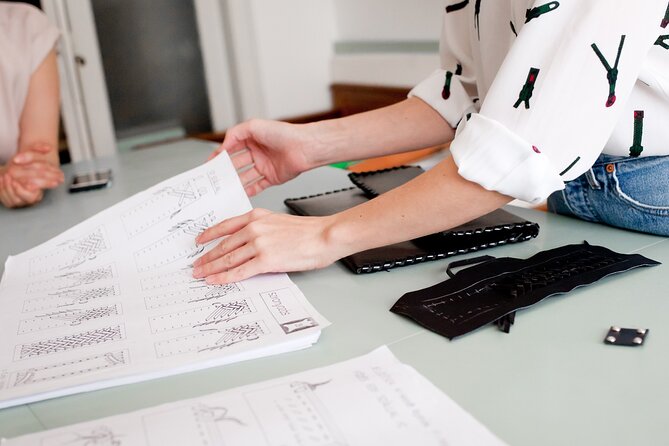
Step 1: You choose your item and start your design plan
You walk in, pick the type of accessory, and then go into the decision stage—colors, materials, metal details, and decorations. This is the moment to slow down and choose something you’ll enjoy pulling out later.
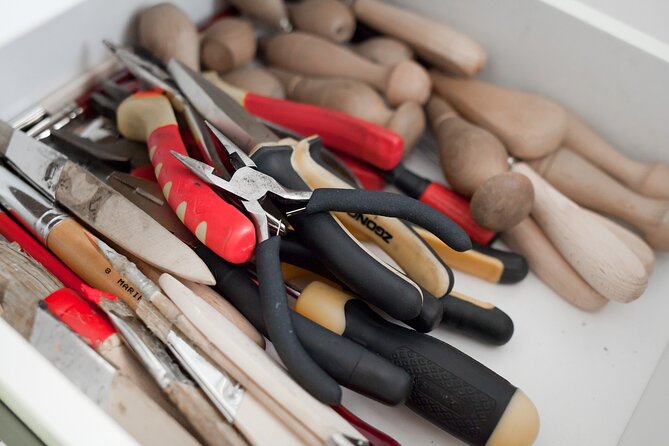
Step 2: You get the “toolbox” with what you need
After you’ve chosen your design, you get a kit with the necessary equipment. It’s not “watch someone do it, then leave.” You’re doing the work with guidance.
For beginners, I like this structure because it prevents the two most frustrating craft problems:
1) not knowing what you’re supposed to do next
2) getting stuck because you don’t have the right tool
Step 3: You follow the tutorial video on the tablet
You’ll get a tablet with access to a professional tutorial video for your specific item. This is huge for learning. Instead of struggling through one-off instructions, you can visually track the steps.
And the instructors are there while you work, supporting you as needed. That support is important because one wrong move on a small piece can ruin the look. The staff helps you keep things on track, even while you’re enjoying the steady flow of making.
Step 4: Team support for the final touches
Even with hands-on making, the experience includes help where it counts. The team makes the final touches as needed. That’s one reason the end result tends to look clean and intentional rather than “I tried.”
The experience also includes stamping your name or initials—so you end up with a personal signature on the piece.
How the 1-Hour Format Fits Into Your Budapest Day
The workshop lasts about 1 hour. That’s a sweet spot for travelers who don’t want to commit half a day to a craft lesson, but still want something more meaningful than a quick museum stop.
With a small group up to 10, you’re not fighting for attention. If you arrive ready to pick a design and you’re willing to make decisions, you’ll likely finish with time to enjoy the process rather than rush at the end.
I also like that this is in downtown Budapest. You’re close enough to plan it as a break between sights—something you can do without thinking too hard about logistics.
One practical tip: if your booking doesn’t show a precise time and you’re wondering when to arrive, message ahead. You’ll get quick replies, and you can keep your day less rigid. That flexibility matters in a city where plans change based on weather and energy.
Personalization That Actually Feels Personal: Stamping Your Initials
At the end, the team adds the finishing details, including stamping your name or initials onto your item.
This is one of those small steps that changes the whole memory value. Anyone can buy a leather accessory. Not everyone walks out with one that carries their initials—something you’ll recognize every time you use it.
It also makes the workshop a strong option for gifts. If you’re traveling with family or friends, you can create something personal that doesn’t require a last-minute run to a shop.
Price and Value: Why $66.08 for an Hour Can Make Sense
The price is $66.08 per person, and the session is about 1 hour in English.
Does that sound pricey? It can, until you look at what’s included:
- You choose the item type (passport holder, cardholder, sunglasses case, or two keychains)
- You get a tutorial on a tablet matched to your exact creation
- You receive the equipment/toolbox
- You get instructor support throughout
- The team handles final touches and stamping
For many travel experiences, you’re paying mainly for entry or for watching. Here, you’re paying for guidance plus materials plus the ability to take something custom home.
If you’re the kind of person who values “one good souvenir” over three average ones, this is a very fair deal. You’re also paying for time and instruction. In craft shops, the cost of tools and a class alone can be higher; this gives you a structured, time-limited way to make something real.
Booking seems to fill up well—on average it’s booked about 50 days in advance—so treat it like a popular activity and lock it in earlier rather than later.
Who This Leather Workshop Is Best For (and Who Might Skip It)
This workshop fits best if you:
- Want a personal souvenir you’ll actually use
- Like making decisions about style (colors, metal details, decorations)
- Prefer guided learning over trial-and-error
- Travel with a desire to do one memorable “hands-on” thing, not just photo stops
It’s also a solid choice for beginners. The flow is structured, and staff explanations are detailed. The workshop is designed so most people can participate.
You might think about skipping if:
- You hate making design decisions (because that’s a big part of the experience)
- You want a totally passive activity with zero choices
- You’re pressed for time and can’t spare a calm hour (the process is one hour, but you’ll still want a bit of mental breathing room)
Should You Book This Mittersisters Leather Workshop in Budapest?
Book it if you want a practical souvenir with real value: a leather accessory you built, personalized with initials, guided step by step on a tablet, and done in about an hour. The small group setup helps the staff keep things clear, and the mix of creativity plus support makes it feel fun instead of stressful.
Skip it if you’re only looking for a quick shopping moment or you’d rather spend the hour doing something that doesn’t require choices. Otherwise, this is one of those experiences where you walk out with a memory you can touch.
FAQ
Where is the workshop located?
You’ll meet at Mittersisters Táska Workshop, Dob u. 34, 1074 Budapest, Hungary. The activity ends back at the meeting point.
How long does the experience take?
It lasts about 1 hour.
What can I make during the workshop?
You can choose one: a passport holder, a cardholder, or a sunglasses case, or you can make two keychains.
Is the workshop offered in English?
Yes, it’s offered in English.
What do I get during the workshop?
You’ll receive a toolbox with the necessary equipment, plus a tablet with access to a professional tutorial video for the item you choose. Instructors are there to support you.
How many people can be in the group?
The workshop has a maximum of 10 travelers.
Will I be able to personalize my item?
Yes. The team adds final touches where needed and stamps your name or initials on your leather accessory.
Is free cancellation available?
Yes. You can cancel for a full refund if you cancel at least 24 hours in advance of the experience’s start time.